Tuesday, 29 March 2022

Shaded Summer Stampin' Up!

 Simple Stamping using Shaded Summer Stamp Set

Still a wet week with no end to the rain in sight. We are never happy with the weather are we.

I decided to change up simple stamping by using embossing powders. They turned out simple and elegent.


 Supplies

Very Vanilla for base card, front and middle 

Gold Shimmer Vellum

Simply Elegant DSP (designer serise paper)

Stitched with Whimsy Dies

Simply Elegant Trim gold or silver

Silver and gold embossing powder

VersaMark stamp pad

Glue

Sticky dots, heat gun and Powder pad.                                                       

Instructions

Cut Very Vanilla to 21cm x 14.8 and fold in half remember bernish your fold.

Cut Gold Shimmer Vellum to 10cm x 14.3cm

Glue the middle of the vellum and add sticky dots to the corners attach to the front of the card base.

Cut Very Vanilla card front to 9cm x 13.3cm.

Emboss your card front using the Stitched with Whimsy Dies 2nd largest run through the Emboss and Cut Machine.

Now for the powder embossing nutralise the card with your powder pad first

Stamp your image and sentiment using the versamark ink pad (its normally sticky)

Next step is to cover with your gold embossing powder and shake off the excess.

Using your heat gun heat up your powder until it changes to a solid form keep watching as it will burn if you hold it to long.

Do the same thing for the middle of card stock its cut 10cm x 14.3cm.

Very last step is to tie your trim and attach with a sticky dot.

I hope you enjoyed this simple project, your welcome to watch the You Tube video just follow the link below

Remember to scribe to my blog that would be Fabulous.


You Tube Demo for Shaded Summer.      Shaded Summer Stamp Set


Stitched with Whimsy Dies.       


Tuesday, 22 March 2022

Catching Butterflies Stampin'Up!

 Simple Stamping with "Catching Butterflies"


Todays card is a simple card using a double gate fold. I love Granny Apple Green with Melon Mambo colours.


Supplies

Catching Butterflies Stamp Set

Melon Mambo card stock cut at 10.5cm x 29.8cm 
scored 7.4 at either end

Basic white card stock cut 10.5cm x 14.5cm

DSP (designer serise paper) Frendly Hello cut 2 pieces 7cm x 10cm

Granny Apple Greed Cut Stock 12cm x 10cm

Basic White Card Stock  12cm x 10cm

Stitched Rectangles Dies - 3 largest Die

Scapes of basic white memlon mambo and Granny Apple Green

Melon Mambo Blender Pens

Granny Apple Green Blender Pens

Glue

Black Ink

Instructions


Cut and score the Melon Mambo card stock, then fold on the scored lines burnish the folds.

Cut The basic white card stock and glue to the inside of the card.

Stamp the inside with your sentiment and a little butterfly colour your butterfly in.

Cut and glue your DSP to the front of the card

Now cut out a stitched rectangle from the Granny Apple green card stock 11cm x 7.5cm.

Glue to the left side front of the card only, I placed it on an angle.

Cut a stitched rectangle from the basic white card stock 11cm x 7.5cm.

Using your blends flick the end into the cap to splatter the front to the basic white stitched rectangle piece.

Stamp the group of butterflies  to the top right side of the card.

Stamp the girl on a scrap of basic white and a single butterfly.

Colour in and cut out.

Add dimensionals to the little girl, add to the left side of the basic white stitched rectangle.

Glue the single butterfly onto the net.

Stamp the sentiment on scape of basic white card stock cut down to 4cm x 2 cm.

Cut the Granny Apple Green card stock to 5cm x 2.7cm.

Cut the Melon Mambo to 2.3cm x 4.6cm  glue the Melon Mambo to Thr Granny Apple Green.

Glue the sentiment to the Melon Mambo piece.

Glue all three pieces to the basic white stitched rectangle botton right corner.

All done add some bling if you like.

Video Link to You Tube


Stitched Rectangles Dies.                              


Melon Mambo Card Stock


Melon Mambo card stock


Melon Mambo Blender Pens


Granny Apple Green card stock


Granny Apple Green Blender Pens


Tuesday, 15 March 2022

Easter Friends Stampin'Up!

 My Second Easter Card and Box for this month


I am just loving this stamp set.


My first project is the Sweet Little Box

Supplies

One Sweet little box                                        Link to on line shop for Sweet Little box


  • DSP (designer serise paper) today I used Abstract Beauty DSP 6.2cm x 8.5cm
  • A scrap of basic white for sentiment
  • matching ribbon
  • Brilliant Rainbow Dies
  • small piece of window sheet cut to 6.2cm x 8.5cm
  • tear and tape
  • Scalloped contour dies or something similer
  • Tombow glue
Instructions

  • Cut your DSP to 6.2cm x 8.5cm  and glue to the front of the box while it is still flat
  • Using the rainbow die cut with Cut-N-Emboss Machine
  • Save the cut outs for your next project
  • Turn over to the back and use tear & tape to a fix the window sheet
  • Now bend on all the score lines
  • remove the sticky tape on the sides and fold the box together
  • add tear and tape to the back edge to hold the Ribbon to the box and glue ribbon in place
  • cut out your sentment using the Scalloped contour dies them stamp happy easter
  • tie the ribbon arrount the box and thread the sentiment on the ribbon as well
  • fill with Fredo frogs or other sweets of your choice to fit.

Second project this week is the matching Slim Line card


Supplies
  • Easter Friends Stamp Set
  • Window sheet to make a template
  • Basic white card stock 21cm x 19cm folded in half
  • basic white card 10cm x 15cm to stamp images
  • Arrange a wreath stamp set for easter eggs and sentiment
  • Life is beatiful stamp set  for the Tree but any tree stamp would work
  • a few ink pads as desired
  • blending brush
  • Tombow glue
  • Dimensionals
  • So Saffron
  • Brilliant Rainbow Dies
Instruction

  • Cut and fold your basic white card stock
  • Cut your window sheet to make hills pattern
  • Using a blending brush with Pear Pizzazz ink pad or another light green ink pad
  • Blend on the bottom of the card using the temple to form Hills for the back ground
  • Stamp your tree in soft suede ink pad and the leaves
  • stamp the the grass  in Pear Pizzazz as well
  • Stamp Happy Easter in Memento Black ink in the middle
  • Glue your Rainbow cut outs left over from the Sweet Little Box on the right hand side
  • On a seperate basic white card stock stamp your Chick and Duck colour in with SO Saffron blending pens
  • Attach the dimensionals to the duck and chick and place on the front of the card
  • Add stamped easter egg as desired
  • Add the clouds from the  Brilliant Rainbow dies
  • Remember to stamp your envelope with a Reainbow
I hoped you enjoy these projects for Easter, next week I will be  using "Catching Butterflies stamp set " from Sale-A-Bration Sale.

To watch my video please follow the link below

Wednesday, 9 March 2022

Easter Friends Stampin'Up!

                           Easter Friends Card and Easter Bag


Easter Bag Supplies

DSP (designer series paper) from Hello Friend paper pack 6"x12"

On the long side score at 1 1/2", 5 3/4", 7 1/4", and 11 1/2"

On the short side score 4 1/2" only

Basic white card stock for stamping 

Basic gray ink pad

So Saffron Stampin' Blends

Matching Ribbon

Instructions

  • Cuts and score your DSP
  • Cut the small corner out to make a tab
  • Cut along the bottom score line to the first score line to make tabs (watch video for more info)
  • Lay flat add glue to your first tab fold over to join and hold
  • Now glue your bottom tabs and fold in
  • Make sure you push from the inside of your bag to glue your tabs

  • Pinch the top and crease half way down
  • Use a hole punch in the top to thread the ribbon through
  • Stamp the rabbit and colour with your blends.
  • Cut out and add dimensionals to rabbit ,attach to the front of the bag
  • stamp your sentiment and attach to bag
  • you can also add easter eggs and a pot if you with


    Easter Card Supplies
  •  Basic white card 21cm x 10.8cm fold in half

  • DSP 10cm x 14.5cm

  • Basic white 9.5cm x 14cm

  • window sheet 11cm x 15cm

  • soft suede scrap of card stock for flower pot

  • scrap of basic white card stock

  • blending brushes

  • Pear pizzazz and Balmy Blue ink pads


Instructions

  • Fold your basic white card base in half and burnish the fold
  • Glue the DSP to the card front
  • With the window sheet 11cm x 15cm cut the top and bottom  cloud shapes for a stencil.
  • Using your blending brush and Pear Pizzazz ink pad light blend over your stensil to make hills for the back ground. clean your stencil
  • With Balmy Blue ink pad using your stencil blend over the edge to create a sky pattern softly.
  • Stamp your Rabbit and colour in with So Saffron blends.
  • Stamp easter eggs and die cut a flower pot.
  • Add dimensionals to the rabbit and attach to the front of the card.
  • Glue the easter eggs to the flower pot add dimensionals to the pot and adhear to the front of the card
  • Stamp your sentiment to the top of the card add some bling if required

Link to the video on You Tube


Link to my on line store


Sunday, 6 March 2022

Wednesday, 2 March 2022

Crane of Fortune Stampin'Up!

 Hello my Crafty friends,

Thank you for watching my live facebook class. I have the written instruction to help and the video link.


Lets start with the Gift Bag holder

Supplies

Crane of Fortune Bundle

1 Ombre Gift Bag

DSP 10cm x 28cm scored at 12cm, 12.3cm (belly Band)

small piece of Mother of Pearl card stock to die cut flower

Basic White card stock for stamping 10.5cm x 15cm

2 x Smoky Slate card 7.5cm x 3cm and 6cm x 2cm flaged at one end for sentiment

Pkt Polished Dots for a little bling

Color ink pads; Calypso Coral, Smoky Slate and Old Olive

Tear and tape and glue

Instructions

Wrap the belly band around the ombre bag using tear and tape to join at the back.

Stamp your flowers or you can cut out DSP flowers, I stamped my image in             

Calyso Carol then wiped off the ink on the leaves with a wet one,  I used my stampin' write pen in old olive and colored in the leaves.

Using the matching die cut out and repeat as we need two flowers.

Cut out  small flower using Mother of pearl card stock.

Flag each end of the ribbon.

Stamp your sentiment on the Smoky Slade card stock and flag the left side only.

Add dimensionals to sentiment and attach to the larger piece of Smoky Slate.

Now on the back of the larger Smoky Slate card stock use tear and tape to attach the ribbon, on the back of the ribbon attch dimensionals.

Back to the belly Band glue your flowers in place to belly band only not the bag.

Glue your long flowers to the middle and attch your sentiment with the ribbon.
remember to add a little bit of bling.

Hope my instruction make sense, if not use the video link below to help you.

The Crane Card

Supplies required

Crumb Cake card stock 10.5cm x 29.7cm Tent fold

DSP with the clouds 10cm x 14.5

3 x DSP Calypso Coral color 3cm x 6.5cm

Crumb Cake for sentiment1.7cm x 7.5cm

scrap piece of soft succulent card stock for die cutting flowers

small piece of basic white for dragon flies

In the middle of the card basic white card stock at 10cm x 14.5cm 

Color ink pads; Calypso Coral, Smoky Slate 

Pkt Polished Dots for the finishing touch.

Instructions

Glue the DSP to the front of the card.

Attach dimensionals to 3 x DSP in Calypso Coral.

Place the DSP in the middle to the right side of the card then the top and bottom it help to get the gaps the same.
  
Lets stamp the Crane and the Dragon Flies on Basic white card using Smoky Slate ink pad.

Cut out your Crane and dragon flies using the dies in your bundle

Add dimensionals to the Crane and put aside

Stamp your sentiment onto Crumbcake card stock using Smoky Slate
ink pad.

Using your dies to cut out the two small plants in Soft Succulent.

Attach your die cuts to the back of the sentiment and glue to the bottom panel on the front of the card.


Now you can attach the Crane onto all 3 panels with the feet of the crane on the sentiment panel.

Add your bling and dragon flies as you like.

Lastly I stamped the dragon flies to the base of the basic white card for the middle.


Remember if you buy this bundle this month of March 2022 and use my host code W6AJ2WME I will send you this kit for free

Link to the YouTube video


Links to my online store at Stampin'Up!


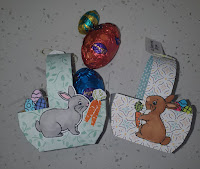
Easter Bunny Basket and Card

  Todays Facebook Live event  was my last Easter Card and Basket for this year. The basket is easy to construct which is what I like. I made...